Thursday, October 25, 2012

No Plumbing Today

Note:

you may wish to click this link     HERE       <---------    * * *

------------------------------------------------------------------------------------

Imagine my surprise when I returned home from work today, wanting to go to the washroom and found out that there was NO plumbing.  There was a cryptic note on the counter warning NOT to flush the toilets


The workmen had disconnected our drainage lines and they hadn't finished connecting them back up yet.  So I had to hold it in.   Lucky we have trees outside . . .  and also that it wasn't # 2

Yesterday when I came home this is what I saw as I parked my car


They had dug a ditch to run a new water line and now they have ripped out my sidewalk.  I put a lot of sweat into assembling that sidewalk many years ago with interlocking brick, and now it is just a pile of debris, to be thrown away


It's too bad I didn't have time to give it a new home.  I am sure somebody could have used these, but I had no way to deliver it and it was just simpler to say "throw it out"


They had to install double valves to we don't lose too much water pressure.


They also started to fill in the ditch, but with all this work going on it is not easy to dig my bike out, so in the meantime I am just driving to work .   Today I arrive home to find that they have started preparations for our new sidewalk, and the interlocking bricks are now gone


The city water line connection was on the wrong side of our walkway so it was easier to destroy it and then re-pour a new cement one.   This is only the initial stage.   I am sure it has to be dug a bit lower and filled with sand and then blocked in preparation for the cement


Here`s a different view looking towards the street.   Our new sidewalkéwalkway is going to be full width to match our stairs


A couple of days ago we received a huge pile of sand to level our back yard and our driveway is almost ready.  I am not sure if I could ride my bike or drive my car over this yet.   I am afraid that it may still be too soft

A pile of sand is nearly as good as a pool of mud,  so I had no choice but to . . .


jump for joy . . .


Wednesday, October 24, 2012

Random 2004 Vacation Photos

This post is just to ensure that my "Insert Image" icon works so this is my last test before I go back to normal programming.  I am so happy that my problem was Internet Explorer and I have now switched to Google+ Chrome and I like it.

Route 66 near Oatman, AZ     November 2004

I have a stack of archived DVD's.  This was the way I used to save my photos.  I carefully removed all the photos from my hard drives and I thought that it would be better to store on a physical disk, but my new way is just to buy more Hard Drives as storage is much cheaper than it was 8 years ago.  And also it takes a lot of time to move gigabits of data

Route 66  Arizona       November 2004

This trip was very late in the year as we both couldn't get our time off to match.  At least we weren't there during the heat of summer.  I can imagine sweltering in the 100°F heat.   We flew into Las Vegas and the next morning we drove our rent-a-car directly to Route 66, Flagstaff then North to the Grand Canyon

Oatman, AZ       November 2004

Oatman is known for their "wild" donkeys, and they roam freely around the streets begging for food.   We wanted to feed them so we thought we were smart to buy our Carrots in Laughlin where they were cheaper. We came prepared and as Mrs Skoot fed them they followed us everywhere, even inside some of the stores as we were trying to get away from them

Oatman, AZ         November 2004

Here is a view of the unpaved main street.   Not many tourists around this time of year

Donkeys      Oatman, AZ        November 2004

Only the donkey traffic jam, probably more donkeys than people

Abandoned car              November 2004

As you see, I stop everywhere for photos.  Not that it matters but all of these images were taken with a Nikon D70

Sacramento Wash       November 2004

We have never encountered a flash flood before.    Just moments before we passed some cars going the other direction.  I was tempted to drive right through in our Rental car but luckily we didn't as the water got much worse.   We had to turn around and drive an extra 100 miles around to get to where we were going, to Williams for the night.  In retrospect we should have just waited half an hour then perhaps we could cross

Williams, AZ  (I think)      November 2004

We drove through Williams and Seligman then towards Flagstaff and North on 89 towards the Grand Canyon

Grand Canyon, south Rim          November 2004

It was our first time coming here and it was awesome.   Even with a wide angle lens you couldn't capture the grandeur of what your eyes are seeing.   There was so much to take in.   The viewfinder of your camera could only capture a small rectangle

Grand Canyon, AZ       November 2004

We just had to breathe it all in, stare at the views and walk around to a few viewpoints.  Of course I snapped a few photos

Portrait,  Grand Canyon, AZ      November 2004

I alway try to purchase cameras with remote control shutter releases, and I usually bring a tripod.   On every trip I try to come back with at least one portrait of the two of us.    I have given up on asking others to snap photos of us as they never frame the scene the way I ask them to.   I like to do it myself.   I also don't like to use those 10 second self timers.  I had bad results using them because you never know when they "go off" and also you can't survey for people walking into your scene and are usually in the background which you don't notice until you get home


Portrait,  Grand Canyon, AZ        November 2004

I actually had this one enlarged.  It looks like we are standing on the edge of the Canyon without any guard rails in sight

Arches NP, Utah               November  11, 2004   Remembrance Day

A day or two later we ended up in Moab, UT, where we stayed for a couple of days and explored Arches NP and CanyonLands NP

Thanks for looking at our vacation photos.  They were just a bunch I dragged over from my archived DVD to test out Google Blogger and the "insert image" icon.   I am happy to report that it all worked the way it should

As the links to my previous photos will soon be broken,  it is my plan to dig out a DVD every so often and post some photos of years gone by.  For those interested to know; I bypassed the Picasa3 interface, which I don't like and I upload directly to my Picasa Web Album.  I select which photos I wish to display and put them into my temp directory.  I run a bulk resize program which reduces the size of all photos in that directory in one swoop and then I upload all them at once, as a group.  It is fast and easy.   When I want to post an image I "upload from Picasa", highlight the photo, or double click really fast and then resize and position from the resize menu.   The only glitch is that your cursor always goes to the top.


Tuesday, October 23, 2012

I wasn't smiling yesterday

Some of you may know that I had some difficulty inserting photos on my Blog.  With the shutting down of Webshots most of my photos are going to be deleted and my previous blog entries will be reduced to text only.  I am not super happy about losing 5 years of hard work, time and sweat.

I don't have the resources to reconstruct the past so I am moving forward.   This was easier said than done

Near Big Sur, Calif   June 2011

This meant finding a new image hosting service and trying to streamline my workflow as I was spending too much time doing things manually using HTML, uploading to an external image host, reducing my images from my cameras.   I always shoot full resolution so my files are 18 MP or 16 MP.   Most hosting services have storage limits and Blogger is basically unlimited as long as you keep your images less than 2,048 pixels on the long side

Big Sur, Calif   June 2011

I thought my new method would work but this 2nd photo did not get the resize menu, so I had to alter the HTML dimensions.  I only got the drag bars

I knew I could pay for image hosting but if I used Blogger/Picasa it would be FREE and unlimited as long as I kept image sizes smaller around 2 mp.   I got a lot of help from Karen and I ventured into using Picasa3 but I got frustrated with their interface where their albums were not actual folders so it automatically organized your photos by date archives, but I do like their slide show creation

Alice's Restaurant, Woodside, Calif     June 2011

This 3rd photo also did not get the resize menu and I had to alter the HTML, so my smart method of uploading directly to Picasa did not work.   The images are stored in Blogger as full size 2000x1330, but they don't display Xtra-large like I like

This is just a test post so I can play around with the Blogger compose interface and get more familiar with it as it as I have always posted using the HTML screens.  I like the idea of seeing the text along with my photos.   Using HTML you only get the image codes and when you are posting you are always unsure which image it is that you are writing about

Douglas, Wash     July 2011   (on my way to Montana)

I uploaded this Douglas photo using the "insert image" icon and selected the file from my Hard drive.  I did not get the resize menu on this one either

At this point I shut down my Internet Explorer, saved and closed the blogger interface and started up Google Chrome

I am just posting a few photos which bring back memories of past rides, and also testing where my system is going wrong, trying to discover what works

Kari/BlueKat    Ritzville, Wash    (on our way to Montana together)      July 2011

Now with this photo using Google Chrome, it worked perfectly.  I was able to upload using Picasa Web Albums and I did get the resize menu, just the way it is supposed to work. 

Last year I rode by myself for my first day on the road and Bluekat/Kari & Ron agreed that we could meet up in Ritzville where we would continue as a group of 3

Somewhere on WA2 heading East towards Odessa, Wash      July 2011

I am happy.   This photo was uploaded from Picasa album option and I did get the resize menu.  Did I mention that I am happy right now

There were severe wind gusts along Hwy 2 and I was nearly blown into the ditch.  The winds would gust without warning.  Other than that I was a warm day

Finally our first State,   Idaho       July 2011

Yahoo !  it worked again !   I am happy that the pop up resize menu appeared and I was glad to be able to select Xtra large from the menu

Our first glimpse of Dom/Charlie 6      Hungry Horse, Montana        July 2011

This photo also worked using upload from Picasa and I selected xtra large from the menu

That is part of Dom's hack behind.  We got lost on the way, probably because I was in the lead and Dom was getting worried about us so he waiting on the side of the highway just Waiting for us to pass.   He had been there for a long time and was about to give up when we finally turned the corner.   We were spending a few days with him and his extended family in a cabin in the middle of nowhere, without internet

Abbott Valley, Near Hungry Horse, Montana    July 2011    "our Group"

It was a small cabin but we drew straws to see who got the bedrooms and I volunteered to take the couch as I was riding solo.   Just imagine everyone having to pass by my couch with my feet sticking out for those midnight washroom breaks.

Salinas, Calif     June 2011  bloggers:  WillyD, bobskoot, Viking Dave & BB + Tramp (HD)

One of the highlights of our trip to Calif was meeting Dave, BB and WillyD in Salinas.  I wished that we had more time to visit with them but our host had to get home to feed her dogs so we had to leave

The past few photos are all working perfectly and I am able to choose their viewing size by selecting the Xtra large option, so it looks like Google Chrome works and Internet Explorer was my problem

The next photo was Uploaded using "choose files" from my hard drive.  It works as expected, resize menu and all.  I am happy to be able to do this again and it seems much simpler than having to manually use HTML.  I still have to resize my photos to 2000x1330 but I have to do that anyway if I used Photobucket or Flickr, and it did this with the now defunct Webshots

And finally I had to finish this post with this

Autumn in Vancouver     October 2012    

I really appreciated all the help from Richard and Karen,  and a big thank you to the rest of you while I vented my frustrations over the past few days.   Everything now seems to work as it should


Monday, October 22, 2012

A2DP bluetooth Stereo dongle

Last year when I was planning my farkle purchases I decided that I had to have a Bluetooth communicator capable of using a GMRS radio so I could be in contact with other riders during our iMBC2012 re-union in Hell's Canyon Oregon.


I was sick of having to have dangling wires and forgetting to unhook from my bike when I parked.  There are not many units capable of communicating with each other as only until recently with the Sena SMH-10 BT V3.0 which can link 4 riders.  GMRS on the other hand can communicate with any other GMRS radio.  On a group ride with dozens of riders then GMRS radio is the only way to go. 

So this is what I bought.  I have the Camos IMC BT unit.  I also had to buy the GMRS 2-way radio adapter and a MP3 BT adapter so I thought that I was set.   This was a top rated unit with good reviews .  Everyone has switched to the Sena units even though it is not capable of linking more than 4 riders.

But I have no riding buddy and have no one to communicate with other than when I am riding with others.   I wanted to be able to be in touch on rides and also to listen to streaming music when I am on the highway


So I purchased an earphone type am/fm Sony digital radio with pushbutton tuning.  I thought that it would be more bike friendly if I could just push buttons to tune stations, or let it scan on its own.  With the earphone connected it works perfectly and it sounds great  but


when I connect it to my cheap BlueTooth adapter it is like there is no antenna and the stations are very weak with lots of static

Most BT adapters are now A2DP protocol so they will stream stereo music into your helmet headset


It then struck me that these type of radios use the earphone wire as the antenna, and without this extra wire the stations can't be received very well, so I dug out my tools and made a patch cable.

I bought a couple of 3.5mm female/male plugs and soldered one up so now it looks like that in the photo.   I plug in my patch cable, then plug the BT dongle into that cable and now I can stream the music into my headset


I am a hobbyist so I have wire, solder and electrical stuff and a VOM meter so I can do continuity checks so I know that it works before I connect it up

I love to solder things


 The additional wire of this cable acts as the AM/FM antenna, which you need to capture the radio signal.  When you are not using a earphone, you have NO antenna, thus the radio doesn't work very well
Here is what it looks like in action.   I can put this under the plastic map window on my tank bag and still push the buttons to change stations, and see the LCD screen.

Sunday, October 21, 2012

Jumping on Logs

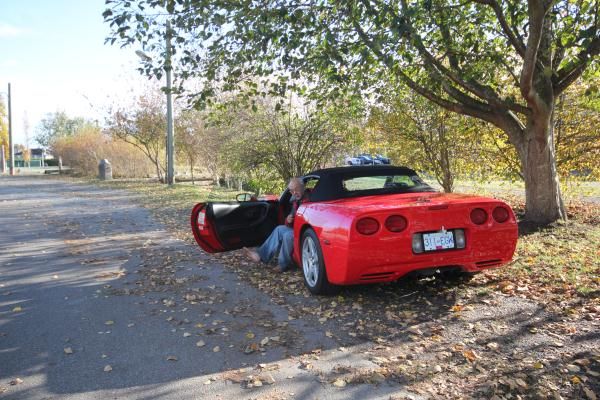
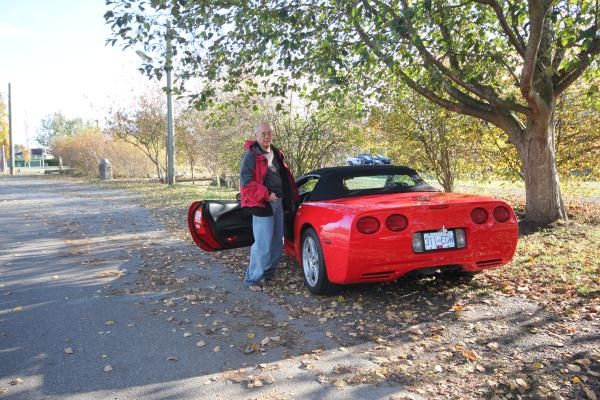
It was a beautiful sunny day, a perfect day for riding my bike BUT the insurance is expiring on my 'Vette and I only have a few days left to drive it this season.  It is also a hassle to move my bike from the rear of the house to the front using the narrow sidewalk on the side of our house, and now . . .


there is a long trench in our front yard, being part of our construction project.  So you can see I am being squeezed, so luckily I decided to drive my car to Steveston for breakfast.

After breakfast I head over to the Government pier and made a quick jump for joy

Yah Hoo, Steveston Government Pier
Yee Haw, "The rain has finally stopped !"


Photobucket

Instead of returning to town I decided to go on the prowl for photos

Photobucket

and stopped at the Historic Britannia Shipyards.  It was nice to feel the warmth of the sun this late in the year.  It is the lull between storms and we have to cherish these days while we are able. I manage to walk around for a while


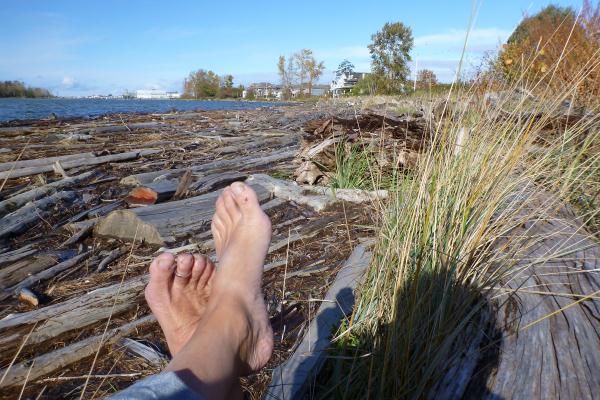
but for now I'll save those photos for another day .  I headed a bit farther East and ended up on the banks of the Fraser River.  There is a lot of debris in the water due to our recent storms

Fraser River, near Steveston BC

Then I decided to try a different process which I have never tried before.  I won't bore you with the details of how the following video was edited and produced, unless you are interested . . .  then I will spill my guts out.  It is a video of still images . . .


It was a relaxing day for me doing what I like to do

Photobucket

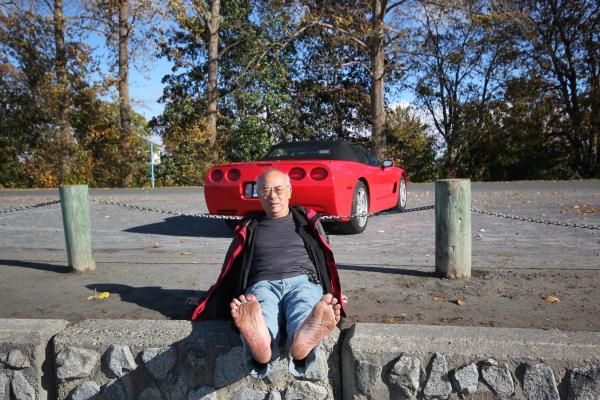
I know, soon I will have to retire my summer shoes for the season . . .


Comments:  with the exception of image #6 (Lumix TS3), all of the other photos were taken with my seldom used Sigma 10-12mm UWA lens, Canon T2i


Friday, October 19, 2012

My GoProHD waterproof case broke

I am very careful with my possessions.  I take care to handle them gently so that they last.  There has been a lot of discussion on the GoProForum about the breaking clip


There is a certain way that you are supposed to "push" the latch as you snap the waterproof case together.  You hold the case on the sides, not on the protruding lens, then you push the tab on the clip very gently until it snaps closed.  This is what I had been doing ever since I bought it.

I am very lucky that this didn't break on our recent iMBC2012 gathering down in Hell's Canyon Oregon.  It broke the weekend after I returned


but since I was going on a ride that weekend to Merritt, BC  I knew that I had to purchase a new case right away.  Imagine a small piece of plastic which cost nearly $50. with the taxes in


I rushed down to our local BB but they didn't have one in stock.  I actually had to go to three stores to find one.  Without this case you have no way to attach it to your RAM mounts.


The new waterproof case also comes with two new rear doors which is nice as they have new seals, rather than having to re-use the old ones that I already had


So there it is, the old case which is now useless unless I can purchase the clip as an individual part.   At the time I was actually thinking of purchasing the New Hero2 just so I can have the case, but I am glad that I waited for the new Hero3 has just been released and it comes with built-in WiFi and has a small remote control which can turn it off and on.  It also hast built-in Bluetooth so you can install an App (android or iOS and control it with your smartphone, which can also be used as a realtime viewer.  This means a multitude of different mounting options to explore.

It is so frustrating to now know if your unit is recording or not, as I have the original Hero1.  The status of your Hero3 will show on your remote by various LED's and it can be mounted on your handlebar

For this post I used Trobairitz's method of Uploading directly from my Hard Drive.  I alsu decided to use Chrome as my browser as it is a Google Product and I thought there may be a problem with my Internet Explorer.  I also decided to upload directly to Blogger for this same reason.  I decided which photos I wanted to use and put them in a separate directory.  I used a bulk image resizer to reduce these images down to 2000x1330 before uploading.   The image pop up menu appeared for all the photos so I had the choice of:  small med large xtra-large left centre right etc for all images.

I tried uploading one at a time, and also multiple images at a time.  The only thing I don't like about this method is that everytime you ADD an image to your compose screen in Blogger, your compose screen goes "TO THE TOP" of your post and you have to drag it back down to the bottom so you can add your text.  Of course this may only be happening to me, and not to you

on my next post I will try using Photobucket and insert images using HTML which is what I am more used to.  Oh, and another thing, when I go to another TAB to find a link, I return to my cojmpose tab and find it closed, so I have to make sure that I  "Save" first before I change Tabs as I don't want to loose anything.

I did some searching on the WEB yesterday about the insert image dialogue and it appears that others have this same problem of not getting the insert image pop up menu for size and position after the first couple of images.  Subsequent images cannot be altered in size from the Blogger compose screen .  There is a workaround if you switch to HTML as you can then alter the HTML code to change the image size but it would just be an inconvenience to have to do this all the time.